Try the Watercolor Quartz Nail Trend for the Dreamiest Spring Manicure
We’ll be wearing this semi-sheer, stone-inspired finish all season long.
Imagine sitting on a sun-drenched patio in the late afternoon, watching light filter through a ribbed glass carafe of iced hibiscus tea. The colors pool on the wooden tabletop in soft, bleeding rings of magenta, lavender, and cloudy white, shifting slightly as the shadows stretch. There is a quiet, meditative ease to the way the pigments blend, completely free of hard edges or rigid lines.
Since you are likely reading this at your desk or on a crowded train rather than lounging in a sunlit courtyard, you can bring that exact sense of fluid, artistic warmth to your day in a much more tactile way. A fresh manicure that mimics this soft, layered watercolor effect on a cloudy stone base is the ideal way to transition your style into the lighter, warmer months ahead.
What Are Watercolor Quartz Nails?
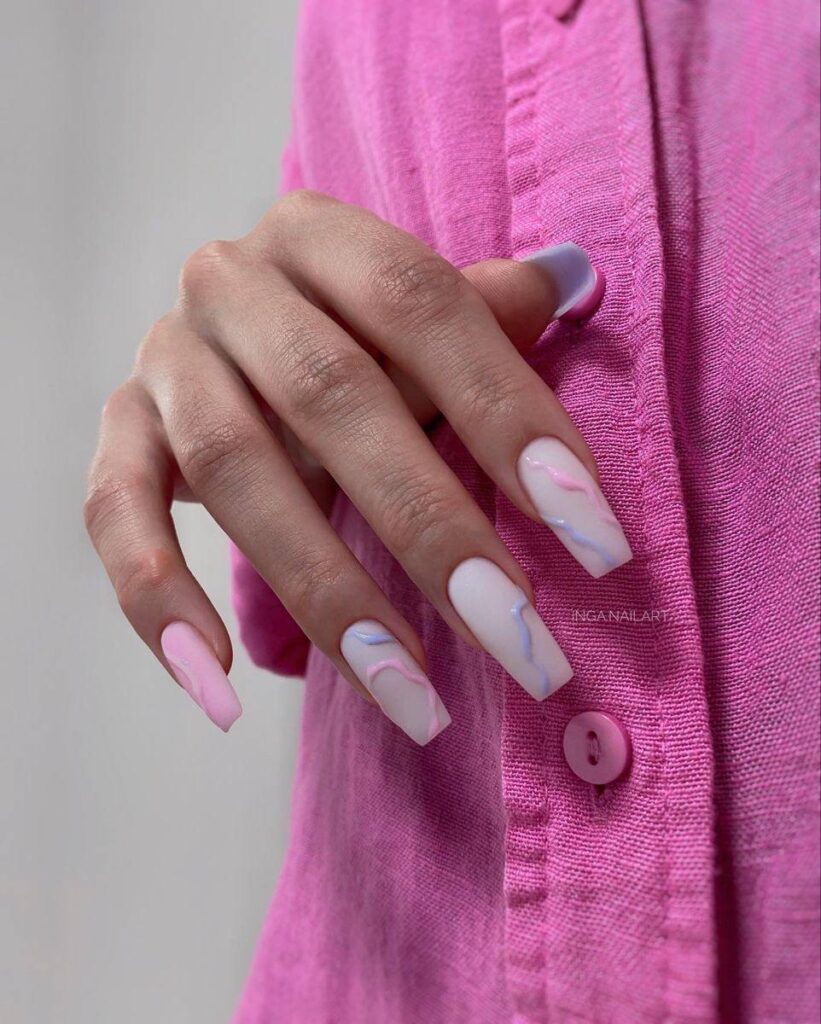
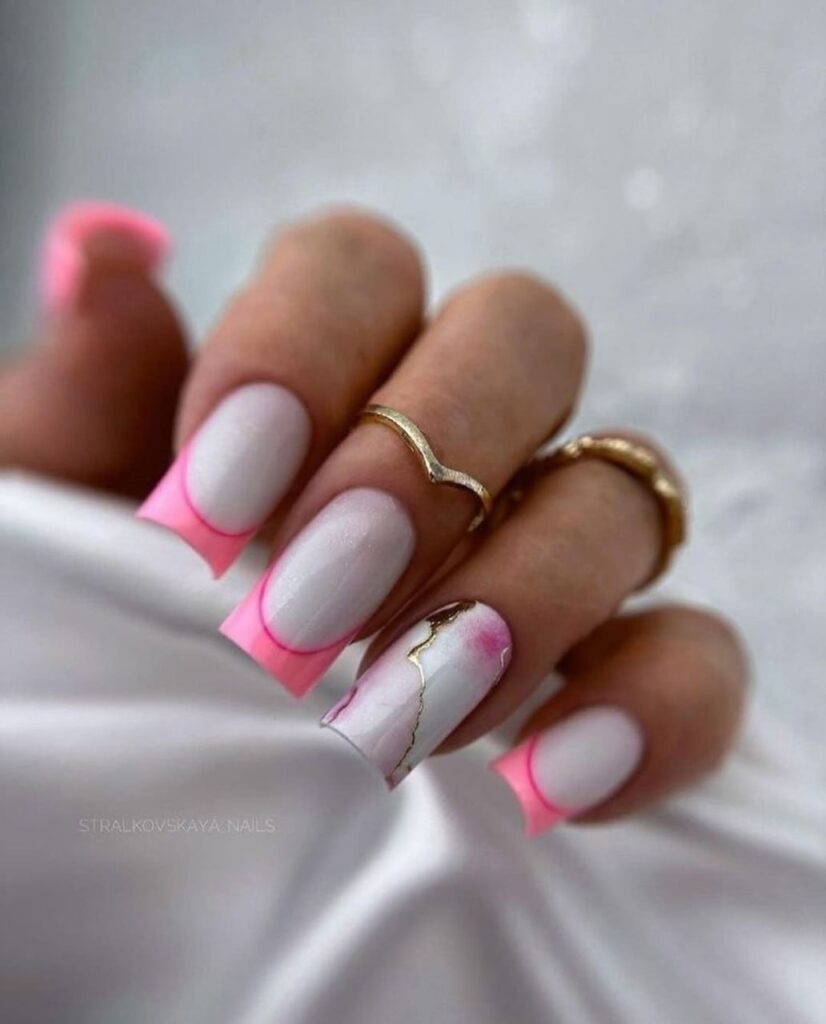
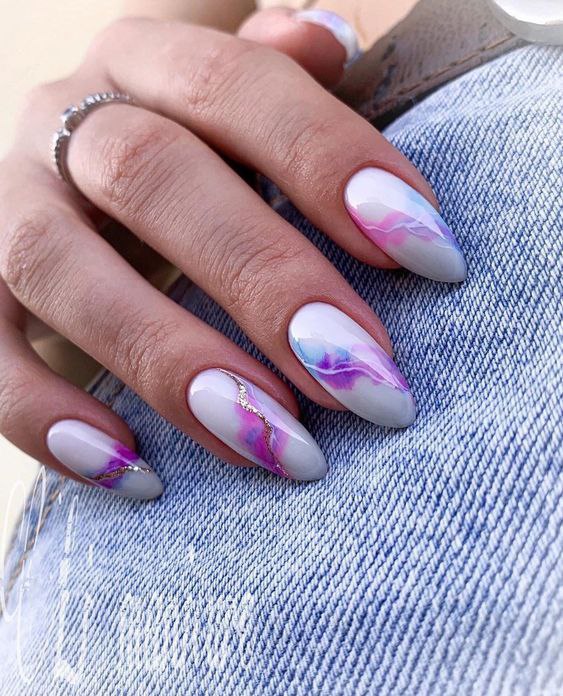
This manicure style relies on a semi-sheer, milky base coat overlaid with delicate, bleeding washes of pastel color that mimic the natural fissures and layers of polished semi-precious stones. Unlike traditional flat nail art, this look uses low-opacity jelly polishes, blooming gels, or isopropyl-alcohol-diluted inks to create a translucent, three-dimensional depth. The final layer is typically sealed with a high-shine glossy top coat, creating a smooth, glass-like surface that makes the colorful swirls beneath look as though they are suspended inside a solid piece of quartz.
Behind the Trend
As the weather warms, there is a natural desire to shed the heavy, opaque layers of winter in favor of something lighter and more airy. In recent seasons, nail trends have leaned heavily toward uniform finishes, such as the high-shine glaze of metallic chrome powder or the stark simplicity of solid, chalky pastels. While those styles offer clean lines, they can sometimes feel sterile. This stone-inspired look offers a softer, more organic alternative that feels deeply personal, as no two nails will ever look exactly alike. There is also a quiet nostalgia to the technique, recalling the childhood joy of collecting smooth, colorful river rocks, or watching watercolor paints bleed across wet paper in art class. It offers a creative compromise for those who want to experiment with color without committing to a loud, solid shade.
How to Get Watercolor Quartz Nails
To achieve this look at home or to guide your nail technician at the salon, you must start with the correct foundation. Begin by preparing the nail plate and applying a clear base coat to ensure longevity. Next, apply two thin coats of a sheer, milky white or pale gray polish. Choosing a semi-sheer formula rather than an opaque, chalky white is essential here; the translucency of the base is what gives the finished nail its gemstone-like depth. Let this layer dry completely, or cure it under your lamp if you are using gel products.
Once your base is set, it is time to build the watercolor veins. If you are using standard nail polish, you can achieve this by placing a few dots of your chosen accent colors—such as lavender, soft rose, or sky blue—onto a piece of foil, then mixing them with a drop of clear top coat or nail polish remover to dilute the pigment. Using a fine, long-haired detail brush, lightly drag these thinned-out colors across the nail in organic, diagonal waves. The key is to let the edges of the color feather out naturally rather than painting a precise stripe. If you prefer working with gel, applying a thin, uncured layer of blooming gel before dropping your colors on top will allow the pigments to spread and soften automatically, creating that effortless, smoky effect.
To mimic the natural shimmer found in real quartz, you can add a touch of metallic detail. Use a very fine liner brush dipped in a metallic gold or copper striping paint to trace along the edge of one or two of your watercolor swirls. Keep this line incredibly thin and slightly shaky; a perfectly straight line will break the illusion of natural stone. Finally, seal your design with a generous layer of a thick, plumping glossy top coat. This step is crucial, as it levels out any uneven texture from the layers of paint and adds the glassy, light-reflecting finish that brings the entire stone effect to life.
For an alternative take on this trend, you can easily swap the glossy finish for a velvet-matte top coat. Removing the shine transforms the look from polished gemstone to a soft, sea-glass texture that feels particularly fresh for late summer. You can also experiment with different color families, swapping the pastel pinks and purples for earthy sage green and warm amber to transition the look seamlessly into the cooler autumn months.