Try the Graphic Ombré Nail Trend for the Sunniest Spring Manicure
A soft, painterly look that lingers well into summer.
The light changes in late April. It stops feeling sharp and starts feeling heavy, like warm honey pouring through a window. There is a specific kind of quiet that comes with a morning walk when the air is finally soft enough to breathe deeply, and the first hints of citrus-scented blooms begin to drift through the neighborhood.
You may be currently sitting at a desk or commuting on a train rather than wandering through a citrus grove, but that sense of seasonal transition doesn’t have to stay outside. You can bring that specific, light-filled energy to your fingertips with a manicure that feels less like a standard service and more like a piece of wearable art.
What Are Graphic Ombré Nails?
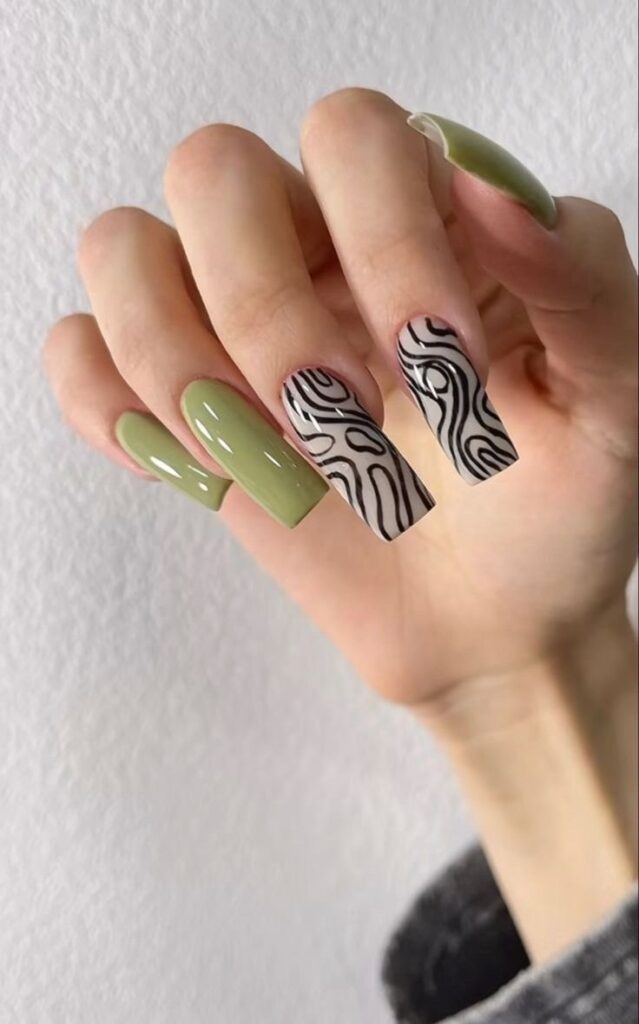
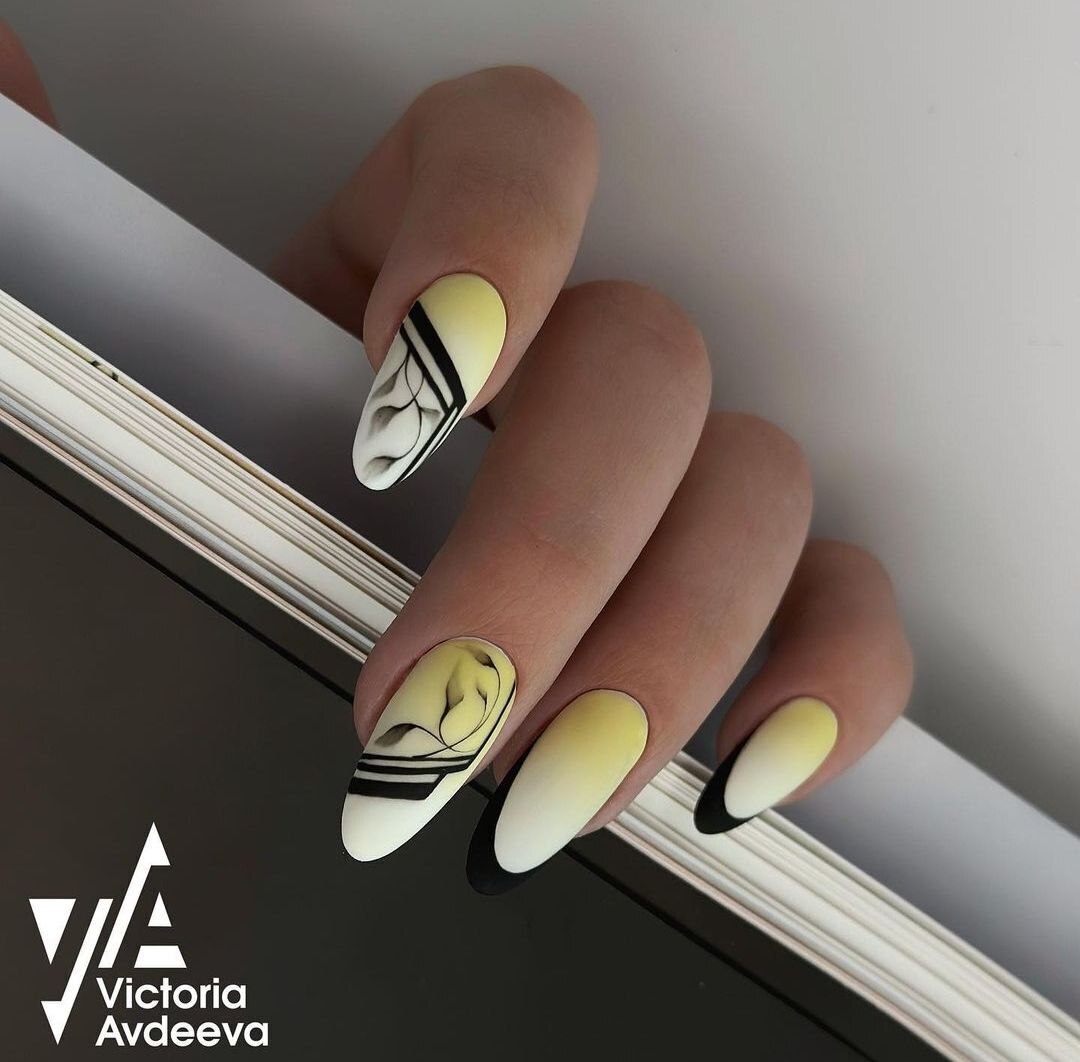
Graphic ombré nails feature a seamless color transition—moving from a saturated hue to a pale, milky neutral—paired with deliberate, hand-drawn black linework. Unlike traditional ombré, which focuses solely on the color melt, this style uses the gradient as a canvas for organic shapes, swirling lines, or sharp, geometric accents. The finish is typically high-shine, which gives the black lines a crisp, intentional appearance against the soft, blurred background.
Behind the Trend
This trend marks a fascinating pivot in the current nail landscape. For several seasons, the industry has leaned heavily into the minimalist aesthetic—think sheer nudes, milky whites, and perfectly manicured short squares that look almost invisible. While that look is timeless, there is a growing desire for something with more movement and personality. Graphic ombré occupies the middle ground between that quiet minimalism and the heavy, textured maximalism seen in recent 3D nail art trends.
It feels more personal and less manufactured. There is a certain nostalgia here, too; the high-contrast palette and the fluid, sweeping lines evoke the mid-century modern aesthetic of the 1950s and 60s, reminiscent of ink sketches found in a designer’s notebook. It is a look that feels curated rather than just applied, offering a way to express a creative spirit without feeling overwhelming or loud.
How to Get Graphic Ombré Nails
To achieve this look at home, you will first need a duo of colors that share a similar undertone—for example, a soft lemon yellow and a sheer, milky white. To create the gradient, reach for a small makeup sponge rather than a standard nail brush. Apply small amounts of each color to different sections of the sponge, then lightly dab the colors onto your nail in thin, overlapping layers. It is better to apply three very sheer coats to build the transition gradually than to attempt one thick layer, which can lead to streaks and a muddy appearance.
Once your gradient base is dry or cured, the artistry begins. You will need a fine-liner brush and a highly pigmented black polish or gel. Instead of trying to create perfect symmetry, lean into the organic nature of the trend. Think of your nail as a sketchbook. Start with thin, sweeping strokes that follow the natural curve of your cuticle or the tip of your nail. You might incorporate a heavy, solid black edge on one finger to contrast with more delicate, spindly lines on another. To finish, apply a high-shine top coat to seal the design; this not only protects the linework but also helps the colors blend even more smoothly into one another.
If you want to experiment with this look for a more subtle evening vibe, try swapping the bright yellow for a muted sage green or a deep terracotta. You can also play with the finish by applying a matte top coat instead, which turns the design into something that looks more like a fine charcoal drawing on paper.